> ## Documentation Index
> Fetch the complete documentation index at: https://docs.calstudio.com/llms.txt
> Use this file to discover all available pages before exploring further.
# Access Code
> Restrict access to your AI app with an access code
Restrict access to your AI app by setting up an access code. This feature allows you to control who can use your app without requiring full user authentication.
## Setting Up an Access Code
1. Open your app in the editor
2. Navigate to the **More** tab
3. Enter your desired access code in the "Access Code" field
4. Save your changes
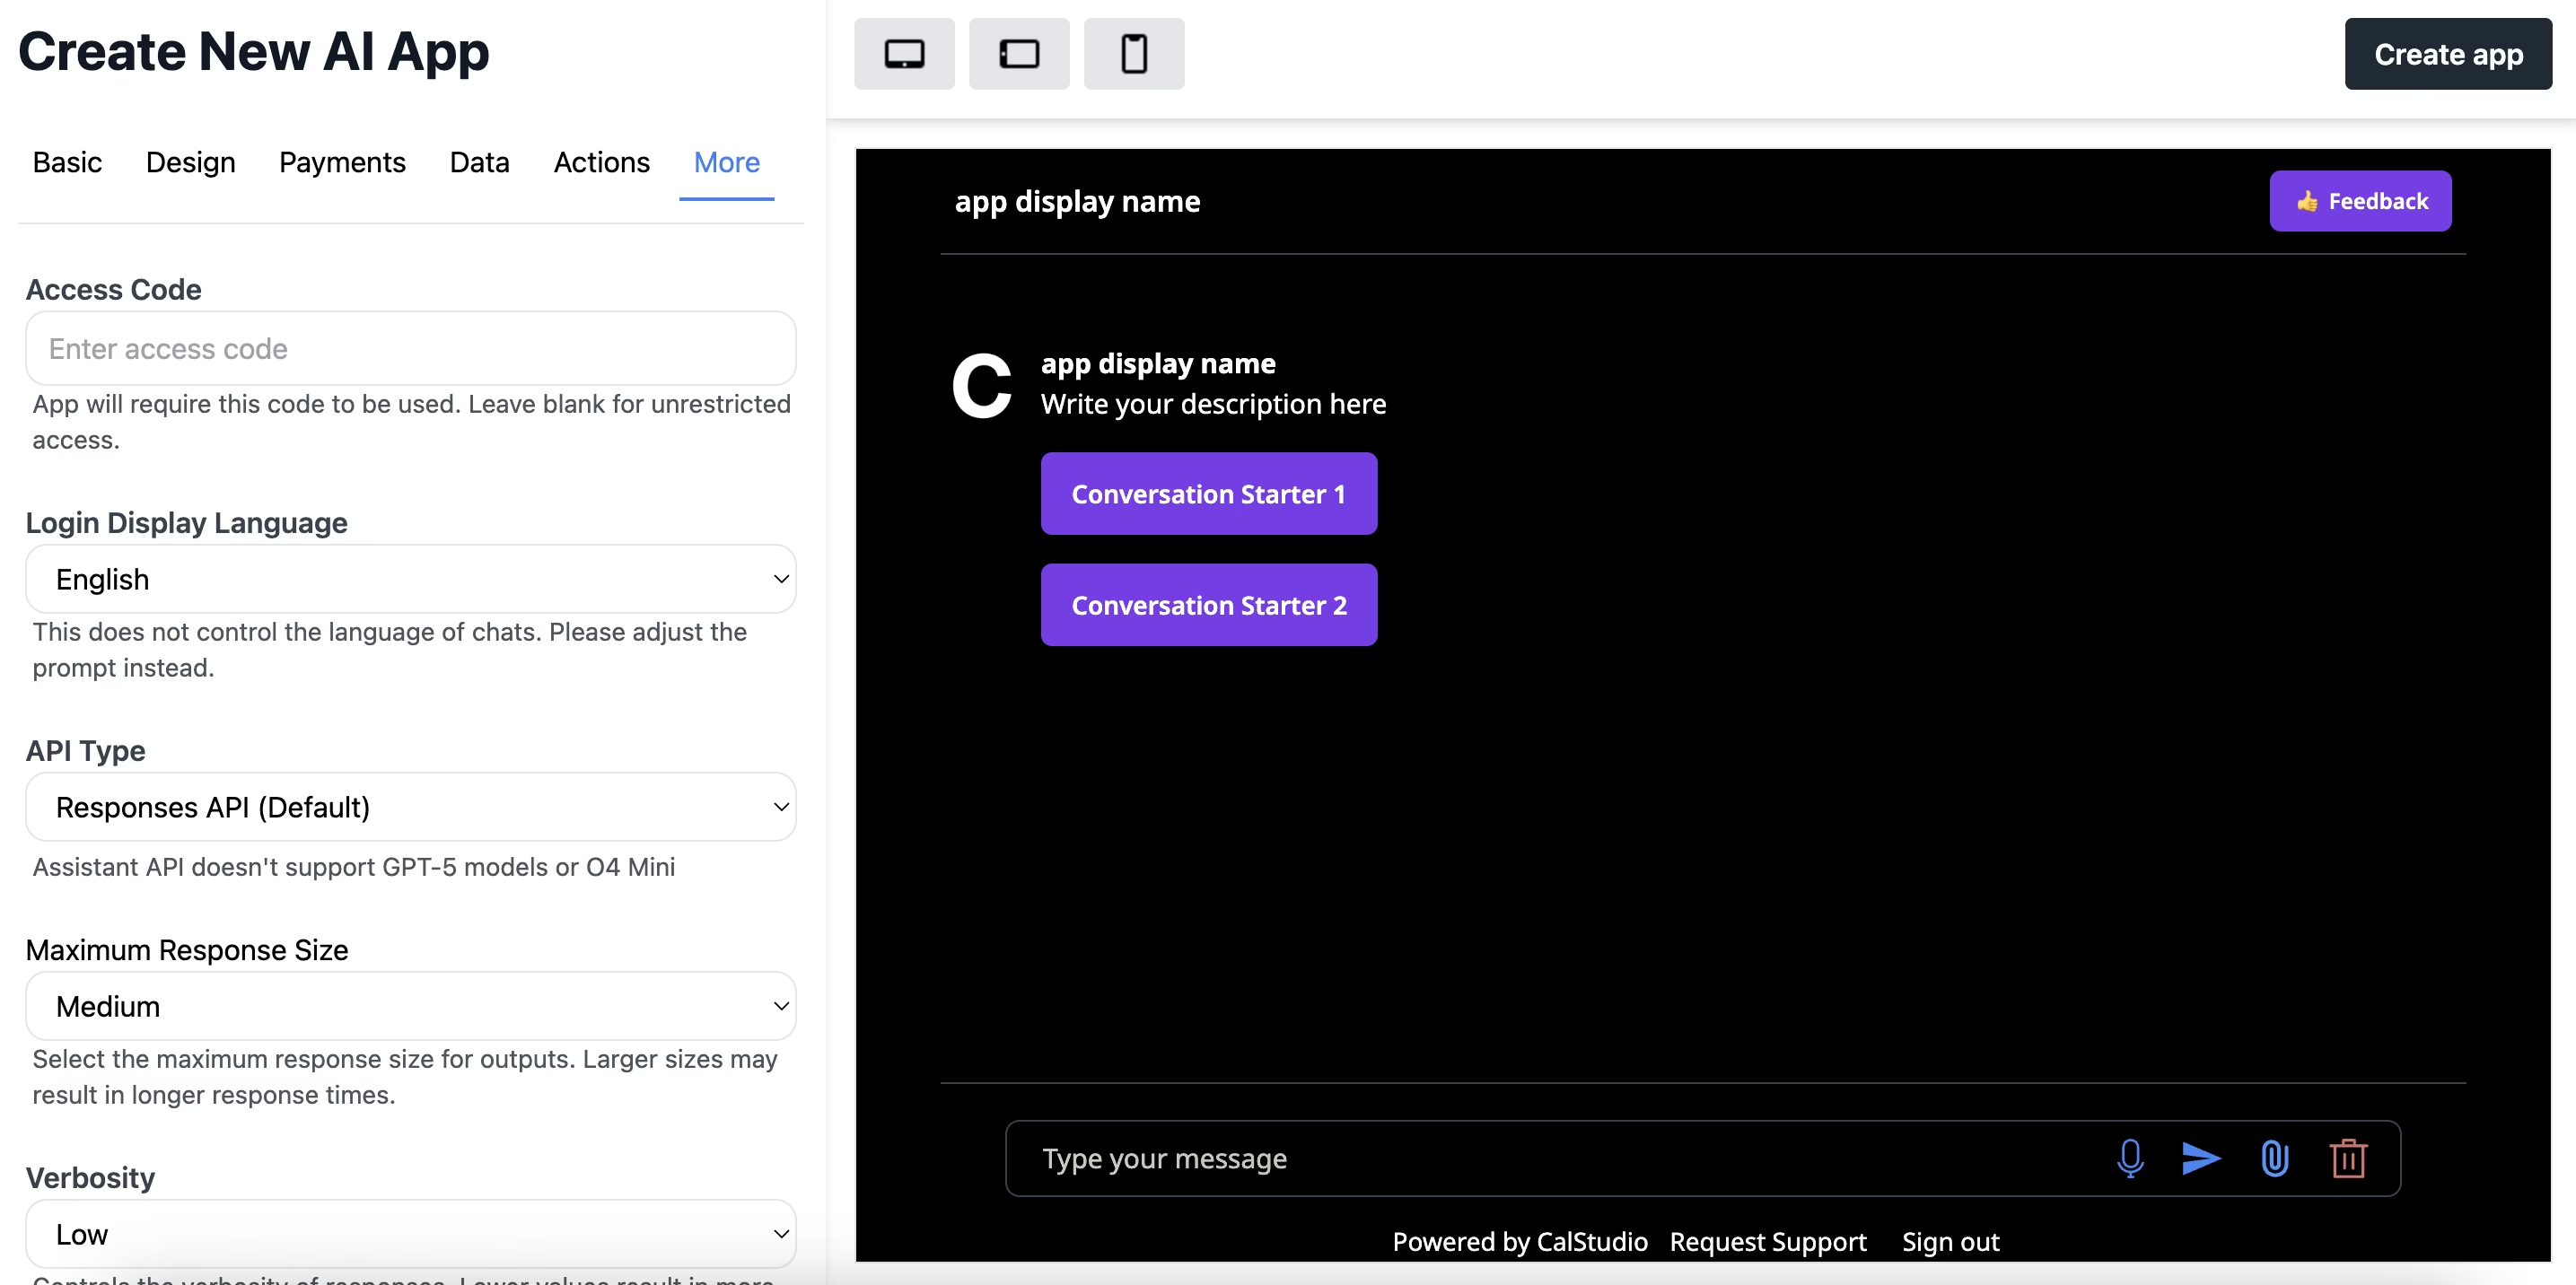 When someone tries to access your app, they'll need to enter the code to proceed. Leave the access code field blank for unrestricted access.
Access codes are great for beta testing, exclusive communities, or paid access outside of the built-in payment system.
## Revoking User Access
You can revoke access for individual users through the App Analytics dashboard:
1. Go to your app's **Analytics** section
2. Click on **Manage Users**
3. Find the user whose access you want to revoke
4. Click **Revoke Access** next to their email
When someone tries to access your app, they'll need to enter the code to proceed. Leave the access code field blank for unrestricted access.
Access codes are great for beta testing, exclusive communities, or paid access outside of the built-in payment system.
## Revoking User Access
You can revoke access for individual users through the App Analytics dashboard:
1. Go to your app's **Analytics** section
2. Click on **Manage Users**
3. Find the user whose access you want to revoke
4. Click **Revoke Access** next to their email
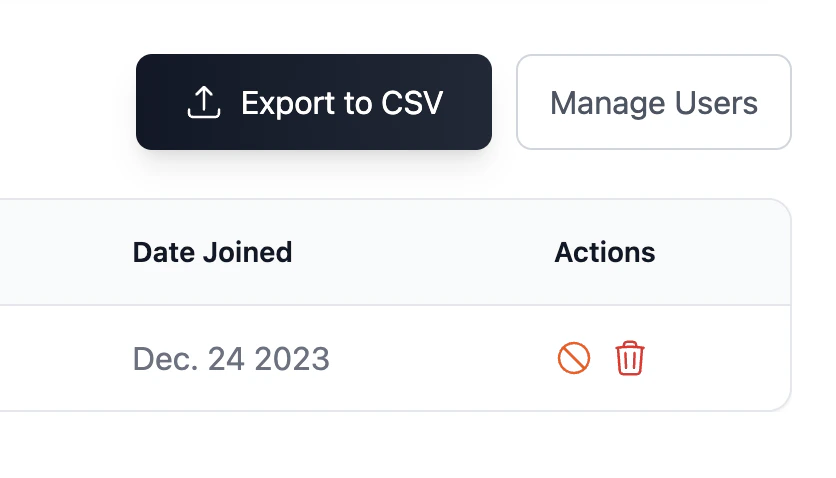 Revoking access is immediate. The user will no longer be able to use your app until you restore their access or they re-authenticate.